I know it might be "Old School" now...but back in my day, we wrote letters on paper to people we loved and cared about and what better way to store those precious memories than in an upcycled embellished old wine box!
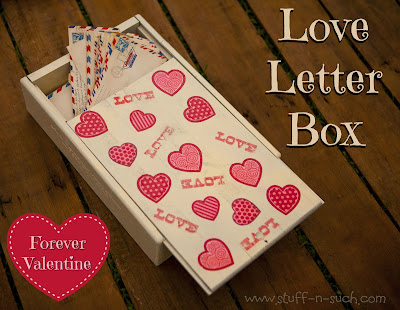
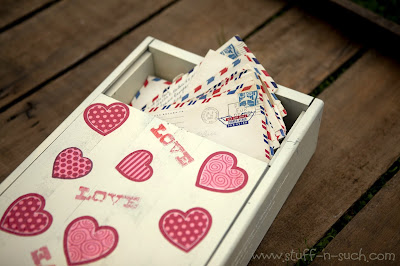
My Sister recently sent me a ton of personal love letters that my Dad had sent to my Mom when they were dating and newly married and he was in the service.

These are precious to me and I wanted a way to store them where I could find them easily, as one day I want to read them all and gain more insight into my parent's relationship. Unfortunately they experienced rocky times in later years and ultimately divorced which was a sad and confusing time for me, but I know these letters will remind me of the love they once shared!

When Angie and Carolina announced the upcoming "Craft Lightning" for Valentine's Day...I knew this project I had in mind would be perfect for these special letters!
For those of you who are new here...Craft Lightning is a great series for craft & DIY bloggers that is hosted by Angie from the Country Chic Cottage and Carolina from 30 minute Crafts, where bloggers/crafters are challenged to create a quick craft that takes 15 minutes or less...minus drying time!
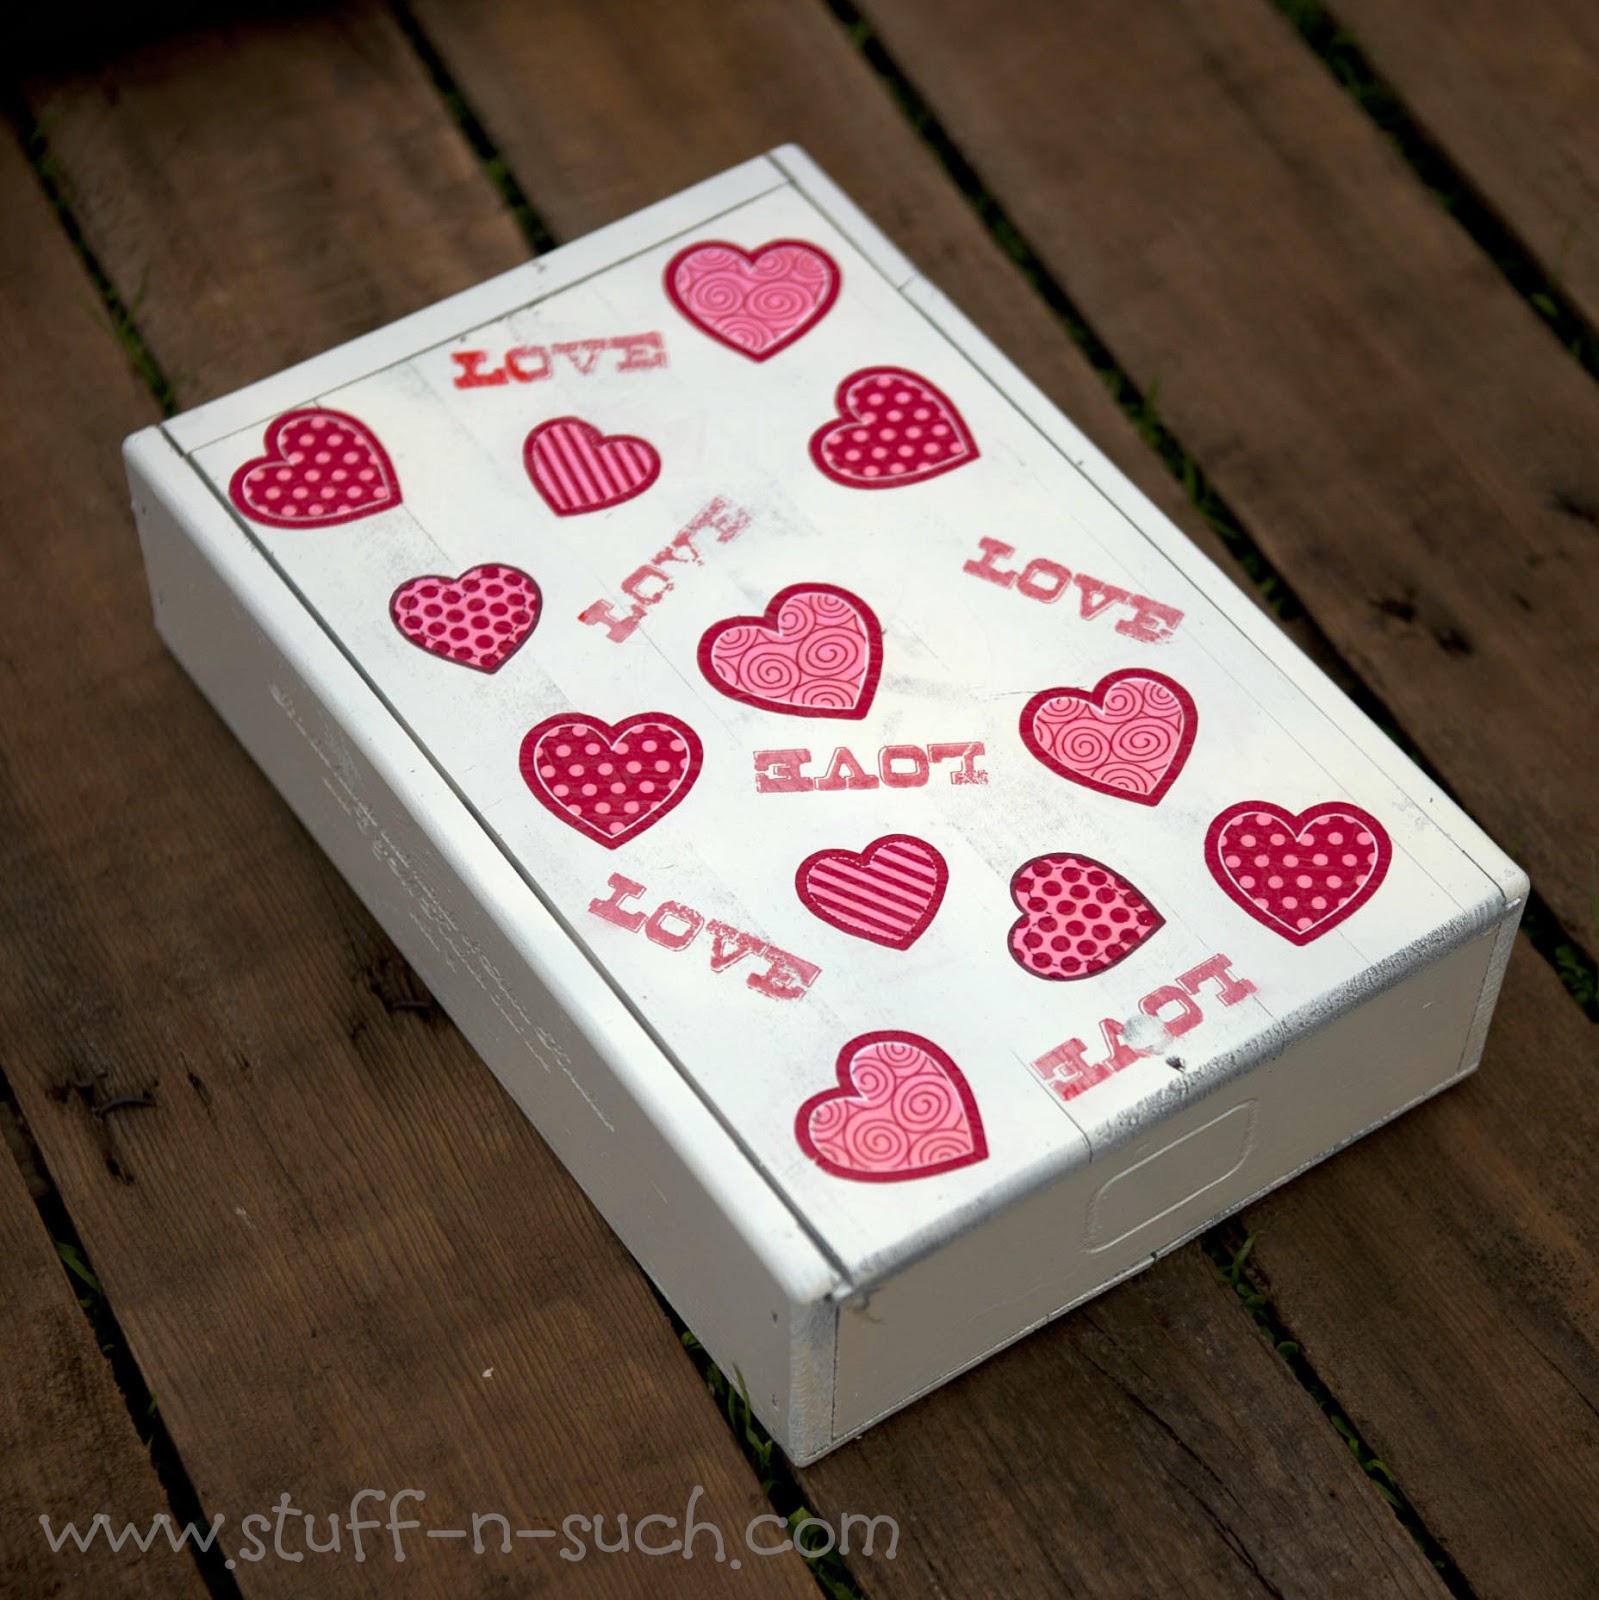
For this project, I kept it simple to meet those requirements...but you could of course get more fancy with this wine box and add more customized graphics or photos, or even stain it and give it an "antique" look!

So many fun and creative ways you can decorate these boxes and upcycle them into something useful and beautiful!

Not only can this box be used for special love letters, but it would make a cute collection box for a child's valentines from school or special photos near and dear to them or to you!
Here is a short video showing the steps taken to make this love letter keepsake box:
Here are the tools and supplies I used for this project:


Supplies/Tool List:
(*Disclosure: Some text may include affiliate links)
Wooden Wine Box
Rust-Oleum Primer and Sealer
ACE Enamel Spray Paint, Antique White/Cooler Beige
Paper Napkins, Heart Themed, (From WalMart)
Scissors
Aleene's Tacky Glue
Mod Podge
Foam Paint Brush
Rubber Stamp, Love, By Craft Smart
Q-Tips (if necessary for touch-up)
Ink Pad, Red, Studio G, Dye Ink*
Krylon Workable Fixatif
Mod Podge Gloss Sealer
* One note about the materials I used...I was a bit inexperienced in using ink on wood and probably did not use the best type of ink or medium to stamp this box. The ink I used was a "dye" type ink and it did not adhere well to the spray enamel paint on the wood and it never really fully dried to where I could coat it with Mod Podge.
What I did to remedy this situation was spray over the stamped areas with a light mist of the workable fixatif. I let that dry and then lightly sprayed it a second time.
Even then, I was not able to cover it with Mod Podge because it began to "bleed" red when I did.
(That is why I needed the Q-tips...to try and fix my messy looking, smeared boo-boo!)
So, I ended up just using the mod podge on the napkin cutouts and after the ModPodge and Fixatif dried...I covered the entire top of the box with ModPodge Gloss Sealer and it worked great to seal the whole thing so it looked shiny and the stamps didn't rub off!
(I think in hindsight I should have used either pigment stamp or acrylic paint to stamp with...oh well...live and learn!)
Hope you are inspired to create by visiting my blog today and be sure to click on the graphic below to see lots of other great Valentine Inspired projects from Crafty Bloggers!
(*Stuff-n-Such, Lisa Hall, is a participant in the Amazon Services LLC Associates Program, and affiliate advertising program designed to provide a means for sites to earn advertising fees by advertising and linking to amazon.com)
This project/post is linked to the following sites/link-up parties:
http://www.craftsalamode.com/2017/02/what-to-do-weekends-party-211.html


My Sister recently sent me a ton of personal love letters that my Dad had sent to my Mom when they were dating and newly married and he was in the service.

When Angie and Carolina announced the upcoming "Craft Lightning" for Valentine's Day...I knew this project I had in mind would be perfect for these special letters!

For those of you who are new here...Craft Lightning is a great series for craft & DIY bloggers that is hosted by Angie from the Country Chic Cottage and Carolina from 30 minute Crafts, where bloggers/crafters are challenged to create a quick craft that takes 15 minutes or less...minus drying time!
For this project, I kept it simple to meet those requirements...but you could of course get more fancy with this wine box and add more customized graphics or photos, or even stain it and give it an "antique" look!

So many fun and creative ways you can decorate these boxes and upcycle them into something useful and beautiful!

Not only can this box be used for special love letters, but it would make a cute collection box for a child's valentines from school or special photos near and dear to them or to you!
Here is a short video showing the steps taken to make this love letter keepsake box:


Supplies/Tool List:
(*Disclosure: Some text may include affiliate links)
Wooden Wine Box
Rust-Oleum Primer and Sealer
ACE Enamel Spray Paint, Antique White/Cooler Beige
Paper Napkins, Heart Themed, (From WalMart)
Scissors
Aleene's Tacky Glue
Mod Podge
Foam Paint Brush
Rubber Stamp, Love, By Craft Smart
Q-Tips (if necessary for touch-up)
Ink Pad, Red, Studio G, Dye Ink*
Krylon Workable Fixatif
Mod Podge Gloss Sealer
* One note about the materials I used...I was a bit inexperienced in using ink on wood and probably did not use the best type of ink or medium to stamp this box. The ink I used was a "dye" type ink and it did not adhere well to the spray enamel paint on the wood and it never really fully dried to where I could coat it with Mod Podge.
What I did to remedy this situation was spray over the stamped areas with a light mist of the workable fixatif. I let that dry and then lightly sprayed it a second time.
Even then, I was not able to cover it with Mod Podge because it began to "bleed" red when I did.
(That is why I needed the Q-tips...to try and fix my messy looking, smeared boo-boo!)
So, I ended up just using the mod podge on the napkin cutouts and after the ModPodge and Fixatif dried...I covered the entire top of the box with ModPodge Gloss Sealer and it worked great to seal the whole thing so it looked shiny and the stamps didn't rub off!
(I think in hindsight I should have used either pigment stamp or acrylic paint to stamp with...oh well...live and learn!)
Hope you are inspired to create by visiting my blog today and be sure to click on the graphic below to see lots of other great Valentine Inspired projects from Crafty Bloggers!

(*Stuff-n-Such, Lisa Hall, is a participant in the Amazon Services LLC Associates Program, and affiliate advertising program designed to provide a means for sites to earn advertising fees by advertising and linking to amazon.com)
This project/post is linked to the following sites/link-up parties:
http://www.craftsalamode.com/2017/02/what-to-do-weekends-party-211.html